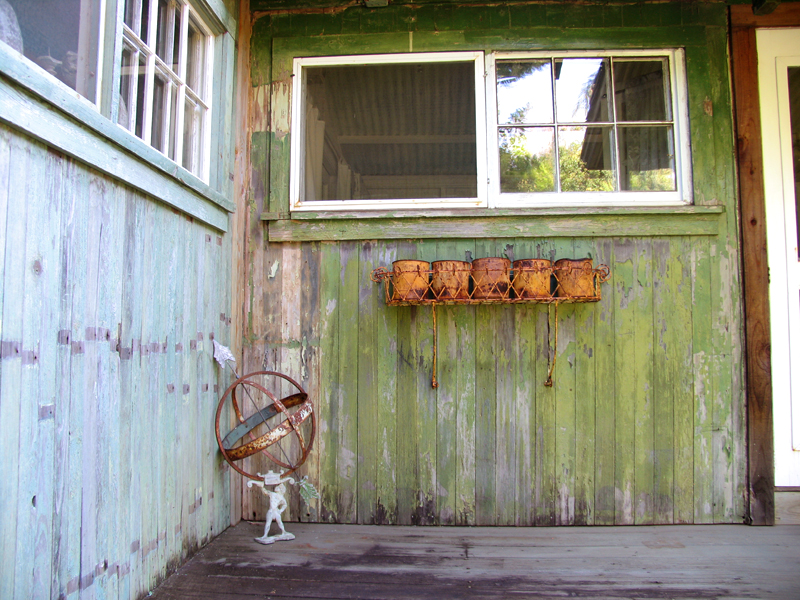
Q. Hey Jordan,
Your most recent post detailed that really awesome vintage DIY furniture project – I have another question about some vintage-y décor.
You wouldn’t happen to know where I can find slabs of distressed wood to serve as photo frames, would you? And by “frame,” I guess I more so meant like a mount that I could paste photos/images onto. The wood in this photo is almost what I’m talking about… but even more rugged edges/distressed looking would be awesome. I’m trying to find huge slabs of it so I can paste homemade collages onto this wood as wall décor.
I just have no idea where to even begin looking for wood like that, and I can’t find any tutorials on how to “distress” wood. I’m based in Brooklyn, so if you know of anywhere in NYC/Brooklyn I’d much appreciate the tip!!
– Kristin
A. I also love the look of distressed wood; fortunately, lucky me has Virgil and Lucy on-site to chew up my armchair and table legs (thanks, guys). If animal-knawed isn’t what you’re going for, though, DIYing distressed wood is super easy. All you need is fine sandpaper and a few tools that you probably already have laying around your house. And maybe some coffee. But that’s it!
1. First, sand the wood gently along the grain, concentrating on the areas that would naturally get the most wear and tear (for example, the corners of a picture frame, or the arms of a rocking chair).
2. Then take the hammer and (lightly! you can always do more later) bang the sides of the piece (wherever dents might naturally occur).
3. Finally, if you want to make certain areas even rougher, rub them with a wire brush or a Brillo pad. You can also use a small chisel, an awl or hammer claw (to simulate worm holes, which are commonly found in aged wood), or a screwdriver to create even more variation. Basically, you can use whatever you have on hand. A heavy chain, some gravel…anything that will rough up the wood.
4. If you want to darken the color of the wood and don’t feel like heading to the store to buy stain, try pouring some strong coffee over the piece. After the first layer is dry, you can add more as desired until you achieve the effect you’re after. Finish off with some furniture wax to get a beautiful, rich glow.
If you’d like to buy ready-made pieces, try Trailer Park Slope; they have great, roughed-up stuff (like wine crates) that you might be able to incorporate into your project.
Image via DwellingsandDecor.


