Q. Hi Jordan!
My boyfriend and I moved in together in August and we are almost all set up…but one of the biggest hiccups so far has been finding kitchen chairs that we like.
We want something bright (a turquoise distressed wooden chair would be awesome), and something with a vintage feel to it, but we don’t want to spend crazy amounts of money on them because, after all, they are just kitchen chairs. I was hoping you might have some suggestions for places to go or some ideas for how to create our “ideal kitchen chairs.”
Christine
A.
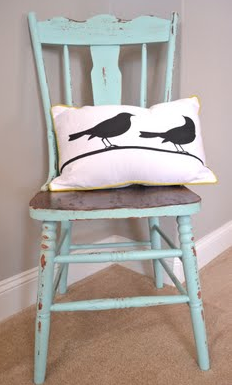
I think this chair is pretty much what you have in mind, right? It’s from Anthropologie. It is NINE HUNDRED DOLLARS.
And while I’m a huge fan of Anthro…I need to know what, exactly, they were smoking when they slapped on that price tag.
There is no need to spend that kind of money.
But never fear: you are going to love this next part, because the fact is that you can have exactly what you’re looking for, and it shouldn’t cost you more than…oh, say fifty bucks. Total.
How adorable is this? You can totally do this.
Start with a trip to your local Salvation Army or Goodwill. Look for chairs with interesting carved details and a great silhouette, but there’s no need to get a matched set (unless that’s what you want). Single wooden chairs – ones that aren’t part of a set – tend to be way cheaper; I’ve found them for as little as $2 apiece.
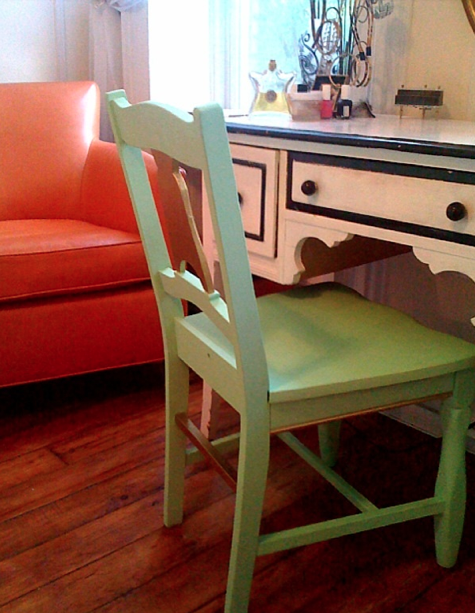
This chair, for example (which I spruced up myself with mint paint and gold leaf)? This chair was free. The guy at the Salvation Army said that it’d been knocking around for so long that he was just glad to be rid of it, and threw it in as a bonus with the rest of my purchase.
And then all you need is an afternoon to yourself to do a little wood-restoring (optional) and painting. Maybe some distressing, if you’re feeling ambitious.
Here’s everything you need to know:
Wood Refinishing Basics
First, a bit about wood-restoring: I tend not to do this on thrifted pieces unless they’re particularly high-quality, mostly because I’m impatient and don’t want to, but also because it just isn’t a big deal to have a chip or uneven spot here and there. If a distressed look is what you’re going for, such things are even desirable. But if you want to give the wood a little fixing-up, here’s what you do:
1. Strip off the old paint or sand off the old stain (start with 80 grit and move up to 150 grit or 220 grit, using a tack cloth to remove sawdust between sandings).
2. Sand again to smooth down the wood. Wipe away dust with a clean rag.
3. Fill in any damaged areas or cracks with wood putty and let dry.
4. Sand down again to create a smooth surface.
Furniture Painting Basics
This is the time-consuming part, but there’s really nothing to it: just apply three thin coats (no glopping the stuff on) using a decent brush, and you’re good. Some tips:
1. Whenever possible, strip furniture that’s already painted and sand it down along the grain of the wood.
2. Use water-based paint on wood furniture.
3. Gloss paint shows everything…only use it if the surface you’re painting is pristine (use semi-gloss or matte for a more forgiving finish.
4. Put down a (big) drop cloth, or lots and lots of newspaper.
5. Nail polish remover gets the stains off of furniture/floors that have been splattered, but spot-test first to ensure that you won’t take off anything you don’t want to.
Wood Distressing Basics
And finally, if the chairs that you find are respectably new-looking and what you’d prefer is a distressed finish (like the chair pictured above), go ahead and DIY that, as well.
1. Sand the wood lightly along the grain, concentrating on the areas that would naturally get the most wear and tear (like the armrests and corners).
2. Take a hammer and (lightly!) bang the sides of the piece, wherever denting would naturally occur.
3. Rub a few areas that you want to look extra-distressed with a wire brush or Brillo pad. You can even use an awl or chisel to make little holes in the wood, if you like.
4. If you’d prefer a stained look to paint and don’t feel like heading to the store, try pouring some strong coffee over the piece, and add more layers until you achieve the desired effect.
More Info:


